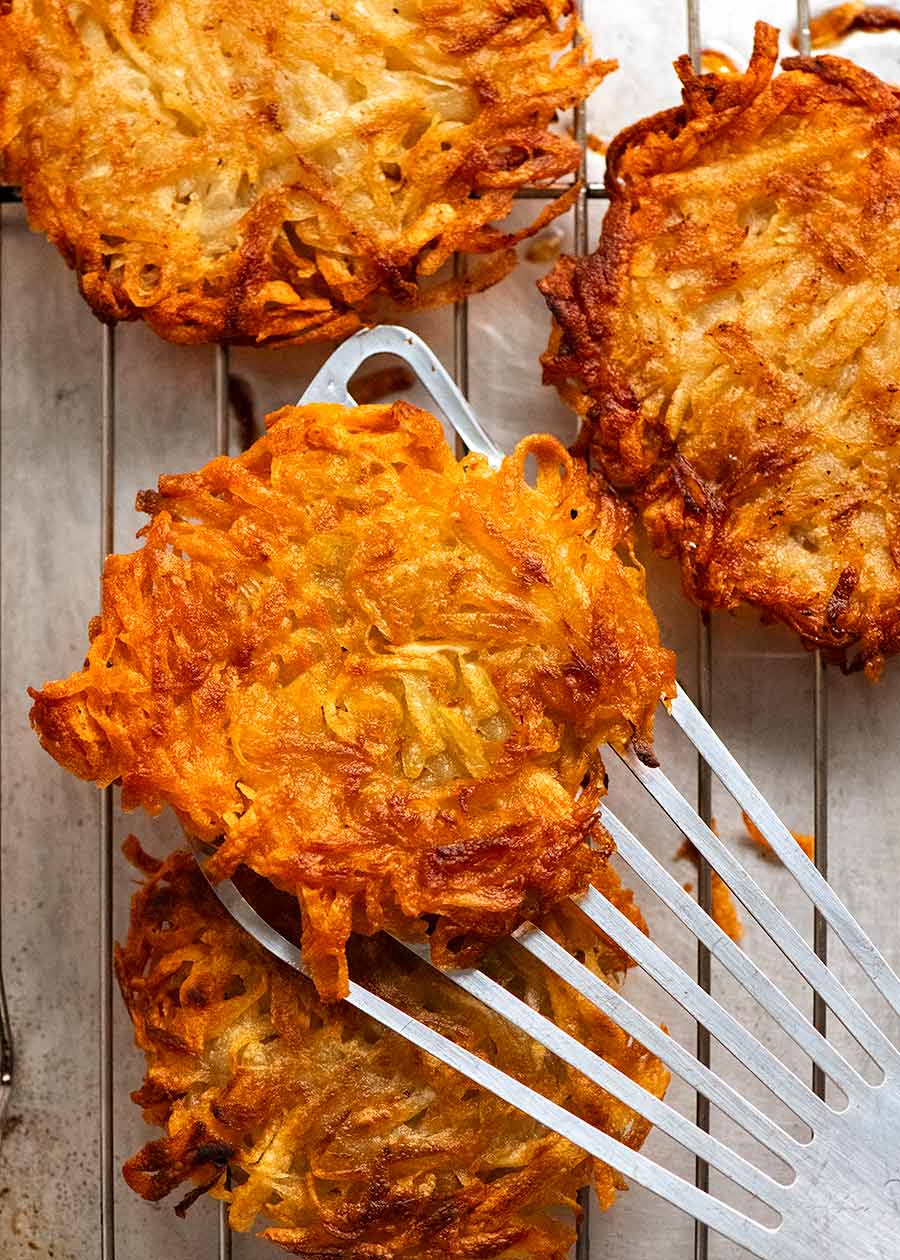
And if you want ultra ultra crispy, make small thin ones instead – they are literally potato crisp crispy!
Potato Rosti
She who was labelled Potato Girl by her family when she was a mere teenager cannot comprehend how she’s made it through 6 years with a recipe website and not shared a rosti recipe. At least, not “properly”. A variation of it is buried in this old Smoked Salmon Rosti Stack breakfast recipe. But – onwards! It has arrived, ready to serve alongside your schnitzels, parmies, an epic standing rib roast or roast chicken!
What you need for potato rosti
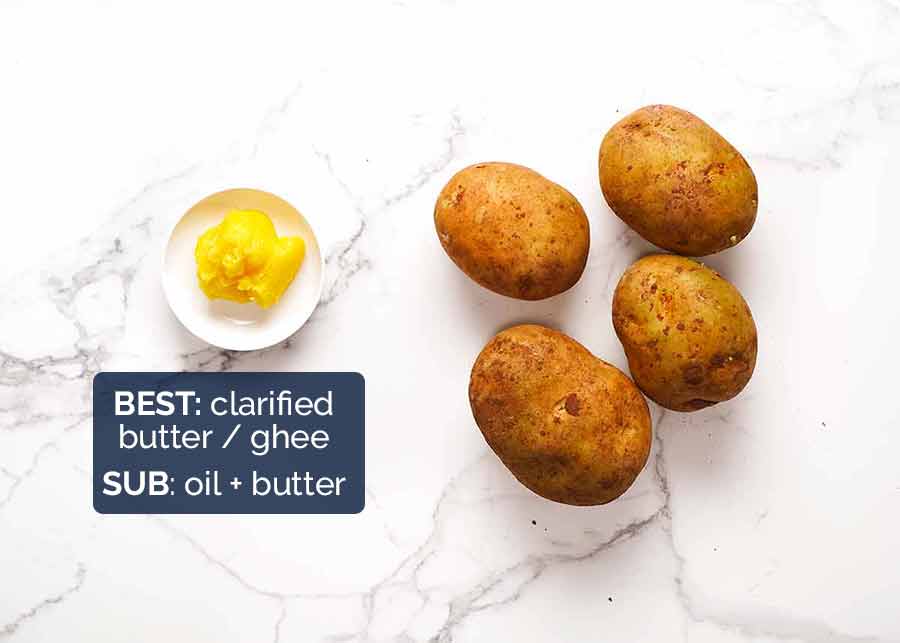
Here’s all you need to make Potato Rosti (I get salt and pepper for free!): However, there are subtle differences:
Rostis (or properly spelt rösti), which originate from Switzerland, typically are pan fried in a medium(ish) skillet then cut up to serve as a side dish for a meal; Hash browns are usually individual size – think Macca’s hash browns – and served for breakfast; and Latkes are also individual size but usually bound with some egg and flour, and because of these additions, they are not as crispy – unless you use basically deep fry them.
Potatoes
There’s no definitive rule about what type of potatoes to use, and there’s no need to get pedantic about it either! Floury potatoes will make the inside more fluffy, a bit like mashed potato, and waxy potatoes hold those lovely strands better, but still very soft and cooked through. Both go nice and crispy, albeit waxy potatoes get a bit crispier. In all honesty, use whichever you prefer – I just use all-rounder floury potatoes to get the best of both worlds. I use Sebago potatoes (Australia, the dirt brushed type) which is a great all rounder that leans towards floury. The equivalent in the US are Russets though Yukon Golds are excellent all-rounders, and in the UK – Maris Pipers, King Edward and Desirée;
Clarified butter or ghee (same thing)
This is for flavour and crispiness. Make your own (it’s cinch!) or buy it (Indian section of large Australian grocery stores, labelled Ghee). Ghee and clarified butter is simply pure butter fat. Butter is made up of ~84% fat, and the rest is water and dairy (milk solids). The water and milk solids are removed leaving pure butter fat which has a much higher smoke point (ever set off your smoke alarm with burning butter??🙋🏻♀️). You also won’t have the little dark brown/black flecks you get when cooking in butter for more than a few minutes, which are the burnt milk solids. Clarified butter also makes the rosti crispier than using normal butter (because butter has some water content = bad for frying) and also has a more intense butter flavour. Best alternative: butter and oil combo. Just using butter gives a better flavour but won’t make it as crispy and you get little black bits from the burnt bits of butter. Just using oil doesn’t have as nice a flavour.
How to make Potato Rosti
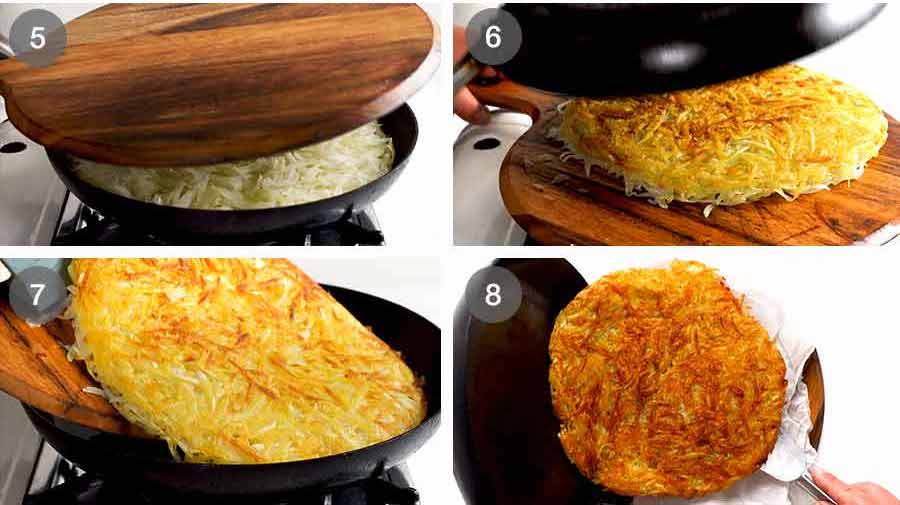
If you’re staring at the giant rosti and already fretting about The Dreaded Flip – don’t! My trick is to use a wooden board with a handle or even a cutting board – just something with some protrusion that you can grip onto for the flip. Much easier than using a plate (says the girl who has lost more rosti than she cares to remember by attempting a plate flip 😩).
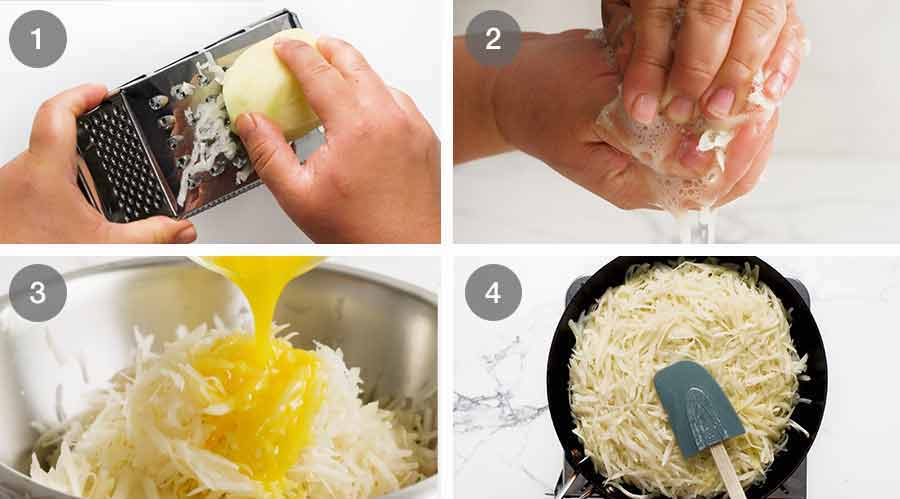
- Grate the raw potatoes using a standard box grater. I like to do it lengthwise to get nice long strands – but it really doesn’t matter how long or short your strands are. There is no need to parboil – I find that makes the inside too much like mashed potato before the outside gets golden;
- Squeeze out the excess liquid then transfer to a bowl. No need to be 100% thorough here, squeezing out every drop of water, because we actually need some of that water to help steam-cook the inside (otherwise it takes forever to cook through!). That’s why I just grab handfuls rather than using a tea towel which is more thorough. However, squeezing out most of the water is necessary because otherwise all that water leeches down to the base of the pan as it cooks and it does eventually evaporate, but it takes longer and stops the base from getting really crispy. Don’t worry if your potatoes go brown / reddish while sitting around. This is just from oxidation (reaction of potato to air) and it’s all bluster; it doesn’t mean the potato is off. Once you start cooking, it will change back to white;
- Mix the potatoes with melted butter (or clarified butter, if that’s what you’re using), salt and pepper;
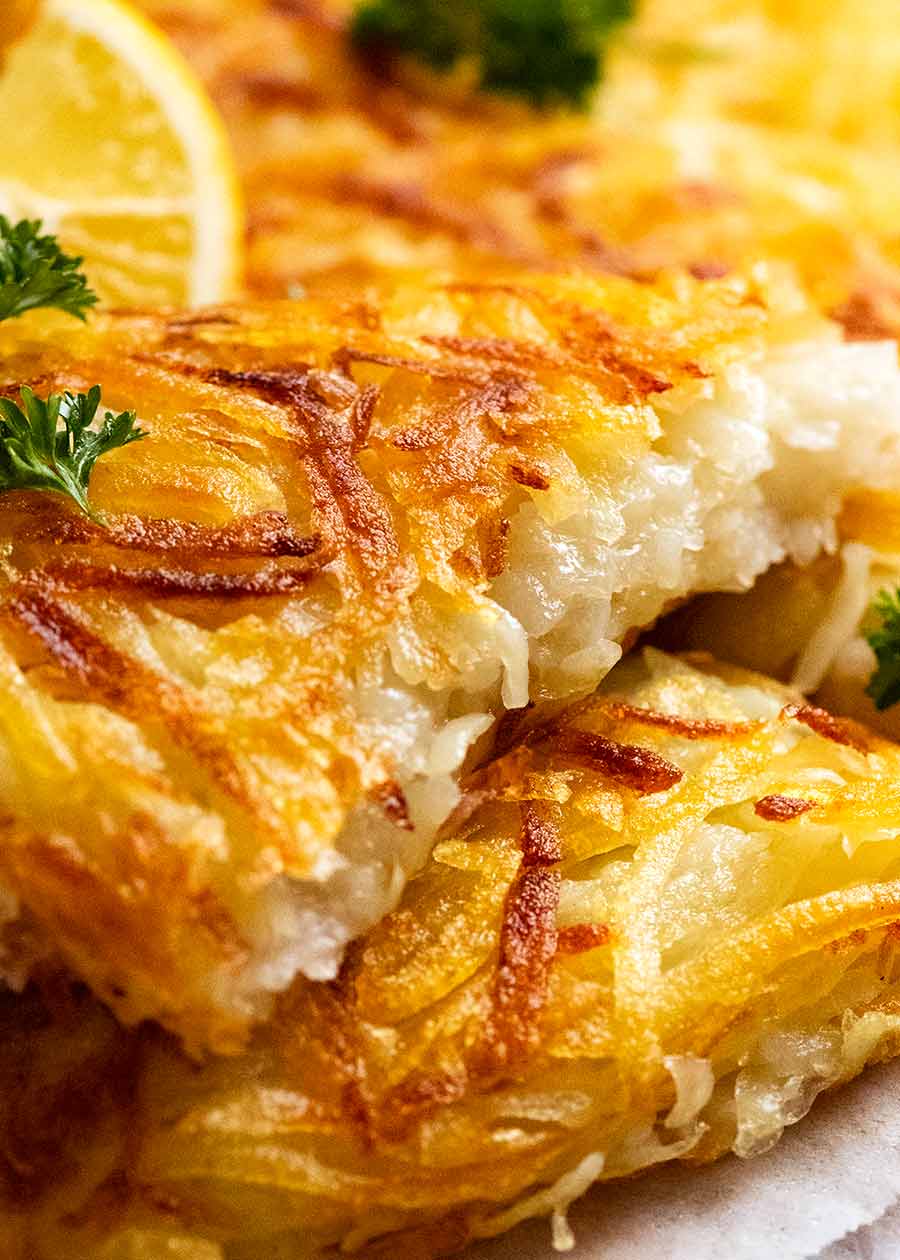
- Scatter into skillet lightly, don’t pack it down tightly. We want FLUFFY on the inside! It will seem quite deep – around 3.5cm / 1.5″ – but it cooks down to 2cm / 4/5″. Cook for 12 minutes on medium low to make the underside golden and for the inside to cook through and semi-adhere together. We don’t want mash – we just want the strands to cook through until soft and bond together enough to be sliceable without falling apart. This is the reason it’s best not to rinse the grated potato – because it removes much more starch than just squeezing out excess water. This results in “slippery” potato strands, rather than bonding together. It takes longer than you think to become golden because residual water from the potato leeches out and that needs to evaporate – which also sort of “steam-cooks” the inside – before the underside goes golden and crispy.
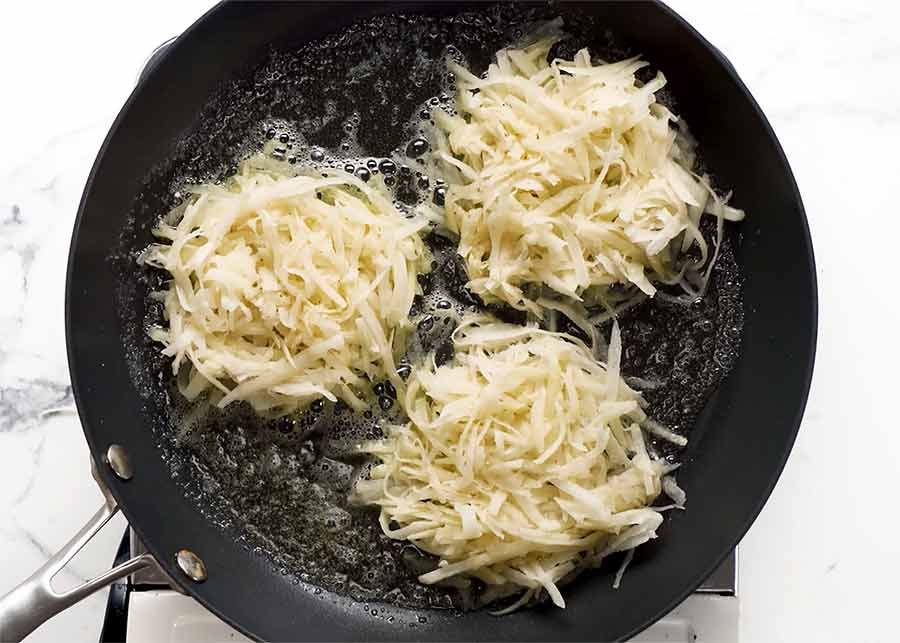
Individual Rosti
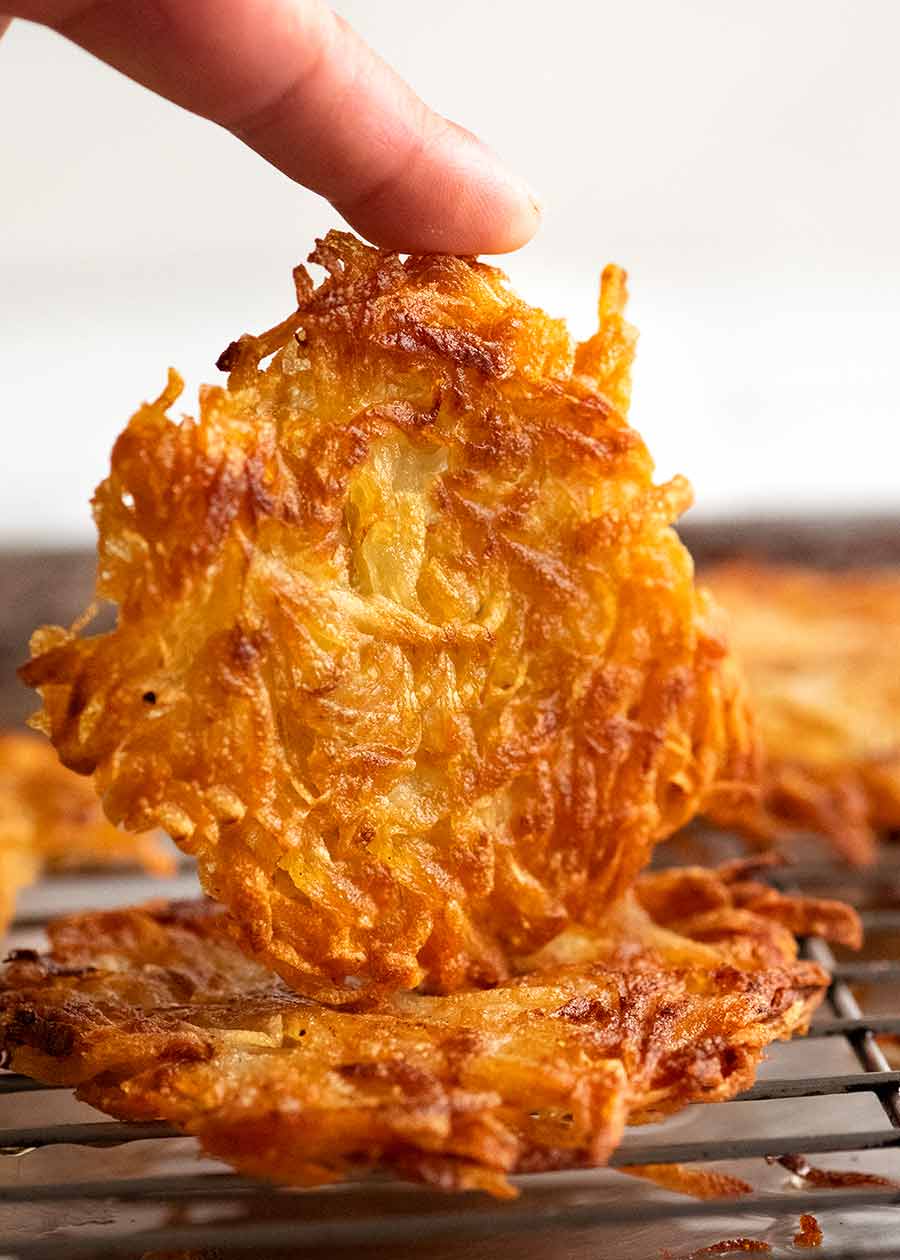
If you’re making small ones, just place the potatoes into small rounds. Again, don’t pack them down – place the potato in the skillet, then use a rubber spatula to push the sides in to form rounds. Resist the temptation to use rings – those little pokey bits on the side get extra crispy!!
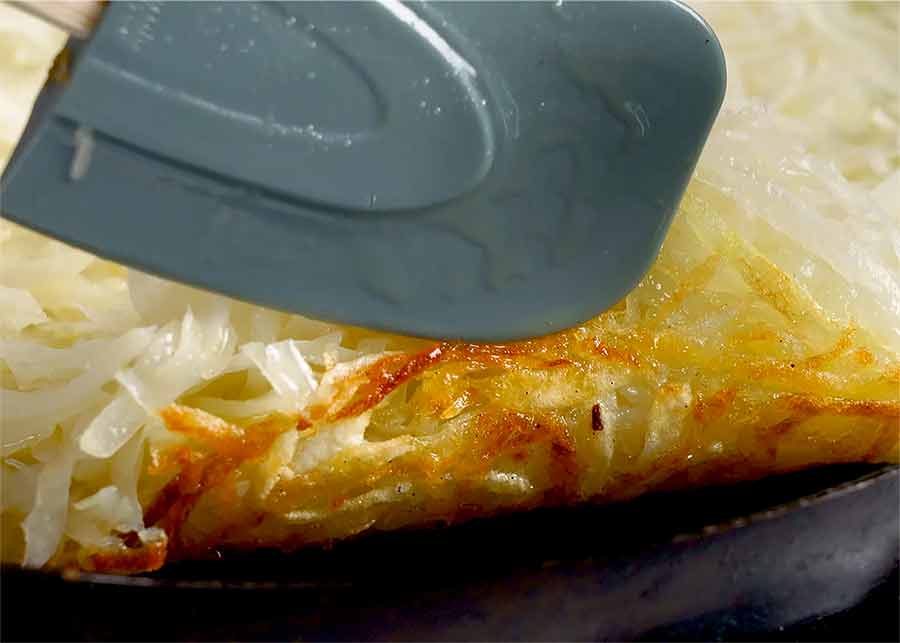
- Flip! When the underside is golden (use a rubber spatula to peek), using a round wooden board with a handle or even a large rectangle cutting board (or plate, if you are a pro!) to cover the skillet then quickly turn to flip! Using a plate is a little more difficult because you don’t have anything to hold onto so you need to press the plate and skillet together very firmly and hold them together as you flip. It’s much easier to do that manoeuvre using something with a handle. Once I switched from a plate to a wooden board with a handle, I’ve never lost part of a rosti during The Flip! It’s also easier to slip the rosti back into the skillet if you use a board, rather than a plate with a ridge;
- Lift the skillet off the board to reveal the golden underside. If at this stage, you realise it’s not as golden as you thought, just flip it back into the skillet and keep cooking;
- Slide the rosti back in, uncooked side down and cook for a further 12 minutes or until you can slide a knife through the centre easily, with no resistance from uncooked potato; and
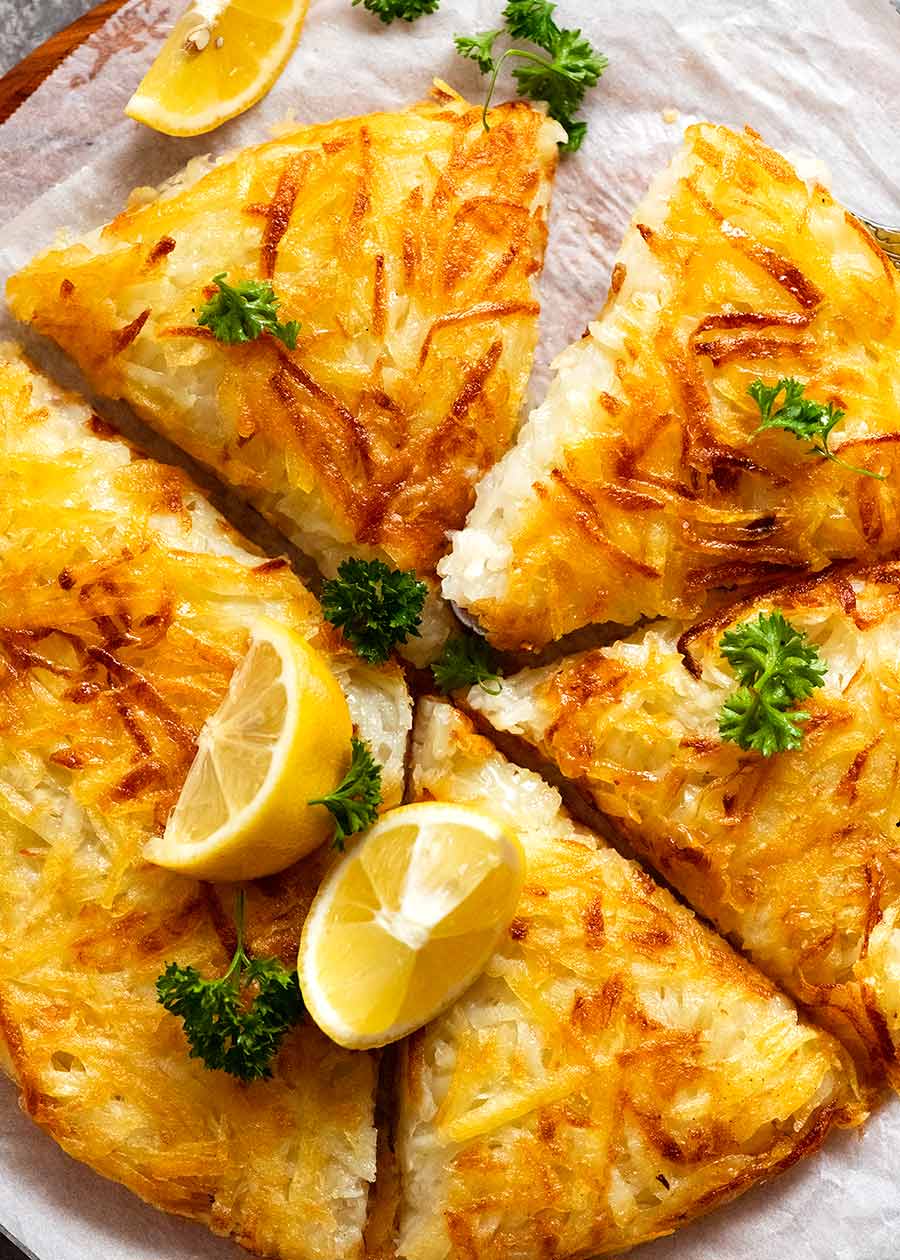
- Slide the rosti onto a serving platter or cutting board. Cut into (large!) wedges and serve immediately!
How to make rosti super crispy
The crispiness of a rosti comes down to the amount of fat you use to cook it – and nothing more. Any type of potato cooked in plenty of fat will become very crispy – waxy or floury. I use 4 tablespoons / 60g of clarified butter to cook my rosti and it makes it quite crispy on each side, but still fluffy on the inside. You will hear how crispy it is in the recipe video!! However if you make thin small ones, they can be potato crisp-level crispy. As in, THIS crispy:
They are pretty much like potato crisps when they’re this thin! So for those of you who rate crispiness very highly, this might beg the question – why would you make a large one instead of small ones? Sheer practicality. For small rostis, it takes up to 10 minutes per batch – 3 to 4 in a medium/large skillet. They will stay warm and crisp in the oven, but if you’re feeding a family of 4, that’s a LOT of batches you need to make, and the time quickly adds up. On the other hand, one giant rosti takes 25 minutes to cook, and it’s low maintenance at that. So for me, it’s a no brainer – I always go the large format.
What to serve with rosti
The first thought for most people is Schnitzel – it’s a pub grub favourite here in Australia! But actually, I find rosti to be a really handy starch side dish that’s cooked entirely on the stove when a centrepiece requiring exact cook times is hogging the oven. When I’ve invested in a precious prime rib, or I’ve been slaving for hours over the perfect Roast Turkey, or making the best ever Roast Chicken, I do not want to muck up oven temps by cramming the oven full of other stuff. Stay away from the oven, people! So a grand potato side dish that’s made on the stove is a very handy recipe indeed, especially around the holiday season – Christmas, Thanksgiving, Easter. Of course, rosti also makes a wonderful addition to the breakfast table, whether in lieu of hash browns alongside bacon and eggs, or accompanying grander affairs like last week’s Eggs Benedict. Though that’s one ambitious breakfast spread, even I’ll freely admit! – Potato Girl x
Watch how to make it
More great potato sides
Life of Dozer
Potato Girls’ Potato Boy.