Blini with smoked salmon
If there is ever a time to get a little fancy, New Years’ Eve would be it. Break open the bubbles, toast the new year in…….. and let’s make a canapé that will impress the pants off your friends: BLINIS! Blinis with smoked salmon are a hors d’oeuvre that often appears on the menu of caterers and function venues a-like. And the reason is simple: it’s a classic that everybody loves. It’s elegant. It’s easy to make in large volume. And it isn’t hard to make at all. They’re just mini pancakes with a smear of crème fraîche and a bit of smoked salmon plonked on top. No big deal!
What’s the difference between a pancake and blini, actually?
OK, time to clarify that blinis are more than just a mini form of your favourite breakfast pancake. 🙂 And blinis are not a breakfast item, they are used to make canapés / hors d’oeuvres. They make great finger food because of their size. One bite wonders! Unlike regular pancakes, blinis are made with yeast rather than baking powder so they are softer and more delicate. And blinis are made with buckwheat flour which gives it the signature slightly nutty flavour. Though I think buckwheat flour is essential for blinis – for flavour – you can still make great blinis using baking powder instead of yeast. Read on to find out how!
Ingredients in blini
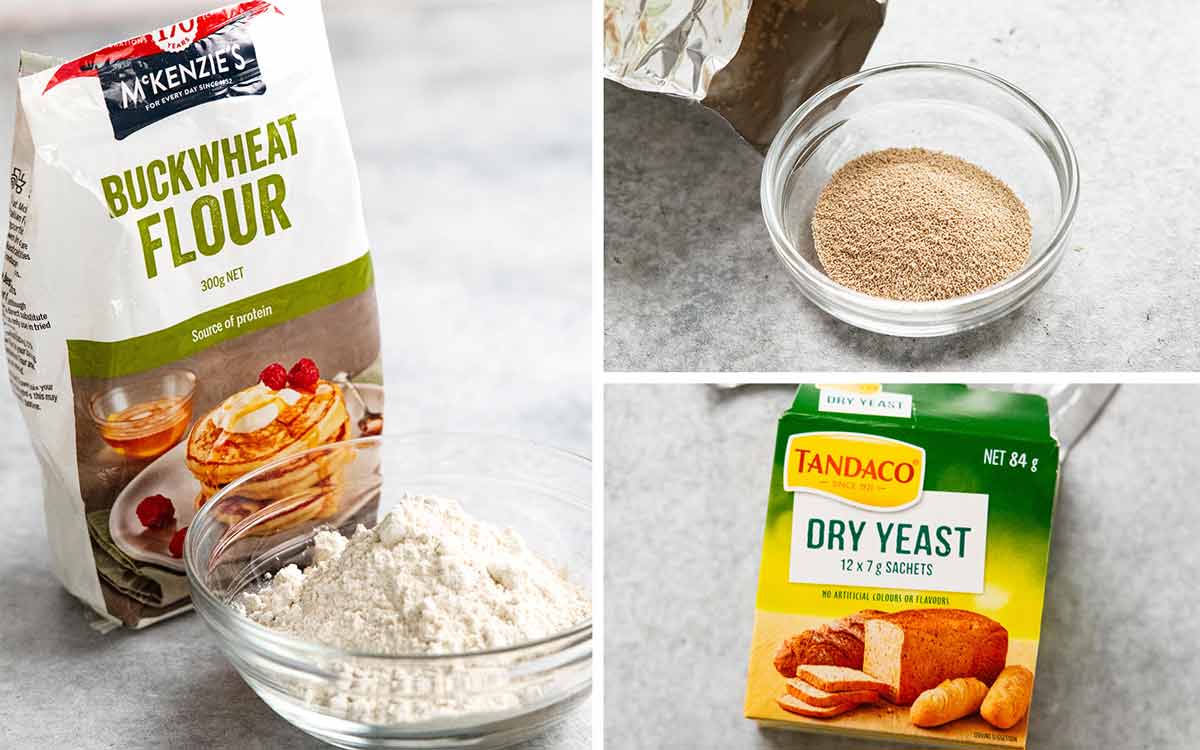
Here’s what you need to make traditional blini. Want a no-yeast version? See the information box below!
Dry yeast (aka active dry yeast) – This is the yeast that comes in small foil packets, as pictured below. I’ve also included an information box below with some extra information on dry yeast vs instant yeast (comes in tubes, yes you can use it), how to make blini with baking powder instead of yeast! Buckwheat flour – This is what makes blini a blini instead of just a mini pancake! It’s actually gluten-free and gives the blinis a distinctive nutty flavour. If you skip it, your blinis will be pretty bland. So – don’t! 🙂 Find it in the baking aisle or health food aisle of grocery stores. Plain flour (all-purpose flour) – Just our everyday flour. Buckwheat provides the flavour. Normal flour is needed so the blini has the desired texture and fluffiness without resorting to xanthum gum and other ingredients you ordinarily need when making breads with gluten-free products like buckwheat flour. Milk – Full fat ordinary cow milk. I don’t see why it wouldn’t work with low fat milk but I am not sure it will work using non-cow milk (like almond milk). Sugar – Required for both a touch of sweetness in the blini as well as activated the yeast to make it foamy (it feeds the yeast to wake it up to make it foamy!). Butter – Just a small amount to add a touch of fat and flavour into the blini. Egg – This is what binds the blini together. Make sure it’s at room temperature so it combines easily with the other ingredients.
Can I make blini without yeast?
Yes, you can! Well, it obviously won’t be traditional blini but it’s still very tasty, 85% similar to the real deal. The big upside is that it’s speedier to make because there’s no batter rising time! Active dry yeast is different to instant yeast (also known as rapid yeast) which is sold in canisters. This is the type of yeast I use more regularly in my recipes because of convenience as it gets mixed straight into the flour etc. without having to foam it up beforehand. Examples – infamous No-Knead Crusty Artisan Bread, Focaccia and Brioche. Why use active dry yeast for blini? Because it’s not as strong as instant yeast, so the batter doesn’t foam up as much which makes it a bit easier to handle to pour neat rounds of batter into the pan. Plus, the blini ends up the right thickness and texture. Not too puffy. Not crepe-like! Can I use instant yeast? Yes you can! The blini does end up a touch puffier but only people who really “know” blinis would notice. The steps are more streamlined so I’ve included directions in the recipe notes. To make blini without yeast, just make my pikelets recipe which uses baking powder instead of yeast as the rising agent. However, use 50/50 plain flour and buckwheat flour instead of just plain flour. You will likely need to thin the batter a tiny bit so it spreads into the blini rounds in the pan (because buckwheat flour is slightly more absorbent than plain flour). The blini is also not quite as soft due to using baking powder rather than yeast. But the flavour is remarkably similar!
Ingredients for blini topping
As you can imagine, there’s all sorts of topping possibilities for blinis. But today, we’re going with a firm favourite – smoked salmon with dill crème fraîche!
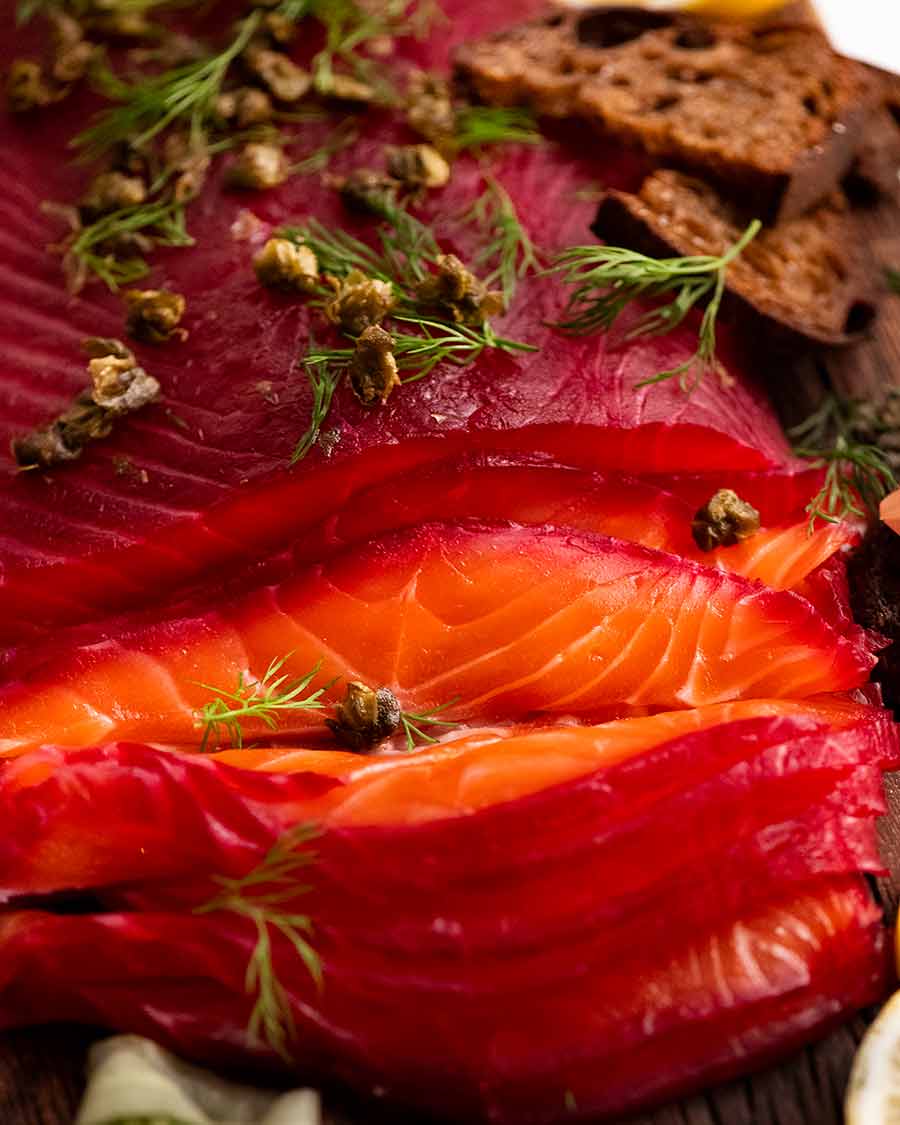
Smoked salmon
Smoked salmon is sold in packets pre-sliced into thin slices. Smoked trout is also perfect to use here. Homemade beetroot cured salmon or salmon gravlax would also be ideal! They taste different to smoked salmon because they are not smoked. And they have fresher flavours from the respective flavourings used. But they have the same texture as smoked salmon – and are cheaper to make too, with fresh flavour you cannot buy!
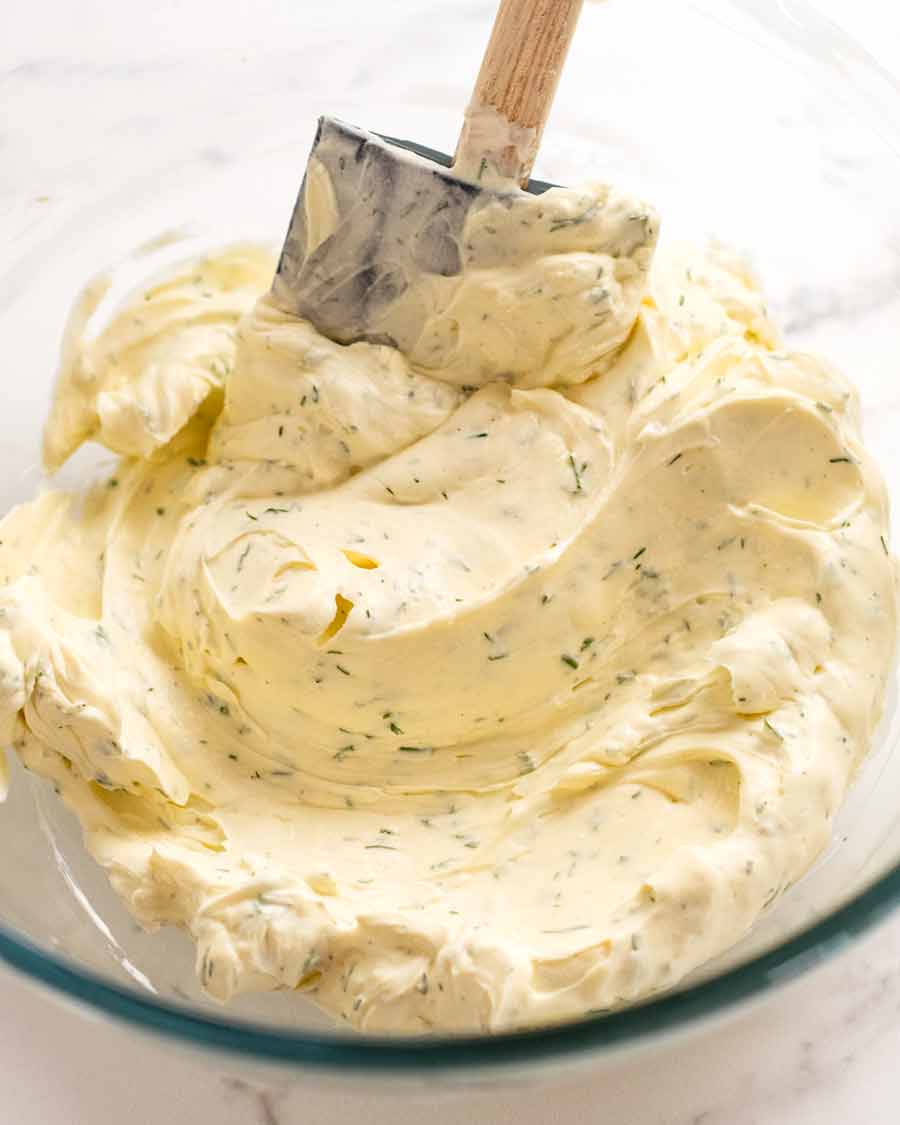
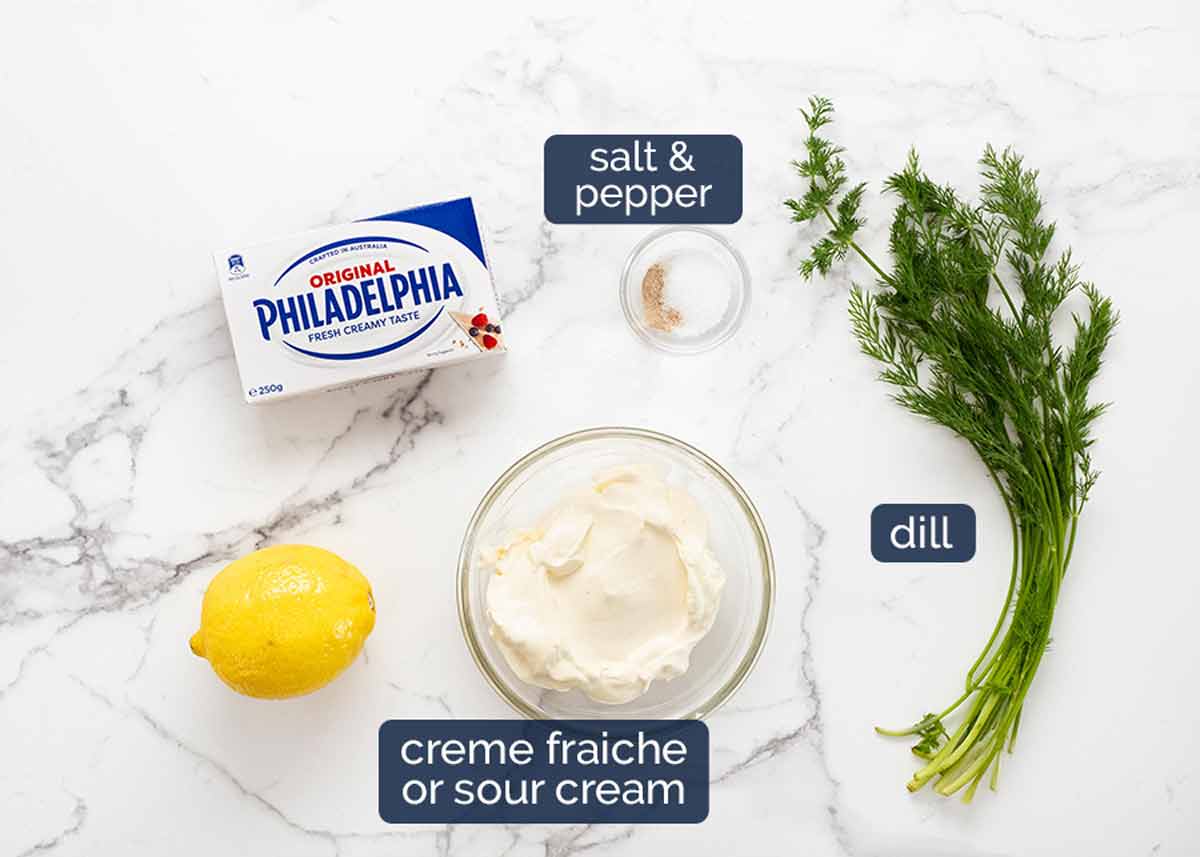
Dill crème fraîche
Crème fraîche – Think of this as a slightly richer sour cream, because that’s exactly what it tastes like. Which means, yes, sour cream is a near perfect substitute and it’s more economical. Sour cream just has a slightly less rich mouthfeel (because it has less fat). To be 100% honest, I don’t think most people could tell the difference. Cream cheese – This is a little thicker than crème fraîche so it prevents the mixture from becoming too runny. We want it to be spreadable, like softened butter. Dill – Not a primary ingredient here, we just use 2 teaspoons of finely chopped dill. So it’s not a deal killer if you can’t find it. Just leave it out, or substitute with chives or parsley. Lemon juice – For a touch of tang, we only use 1 teaspoon. So like the dill, not a deal killer if you don’t have fresh lemon. Just use a vinegar instead.
How to make blinis
We’re really just making mini pancakes here. No big deal! The trickiest part is pouring neat rounds. But if yours come out wonky, who cares? Once you pile on the toppings, no one will notice! And it certainly doesn’t affect the delicious-factor.🤷🏻♀️
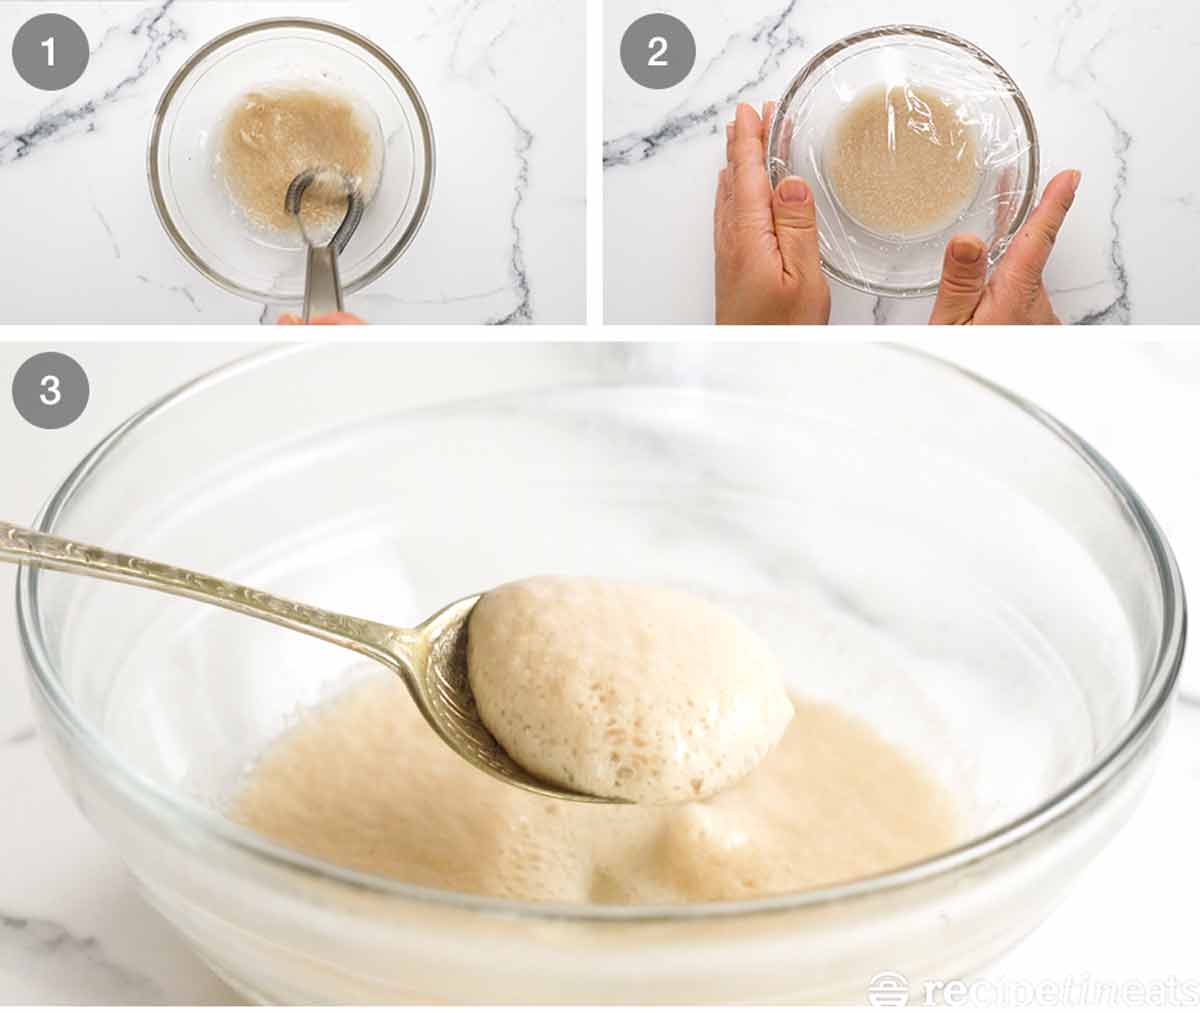
1. Activate yeast (ie foam it up)
First up, we need to activate the yeast. This just means waking it up by mixing it with warm water.
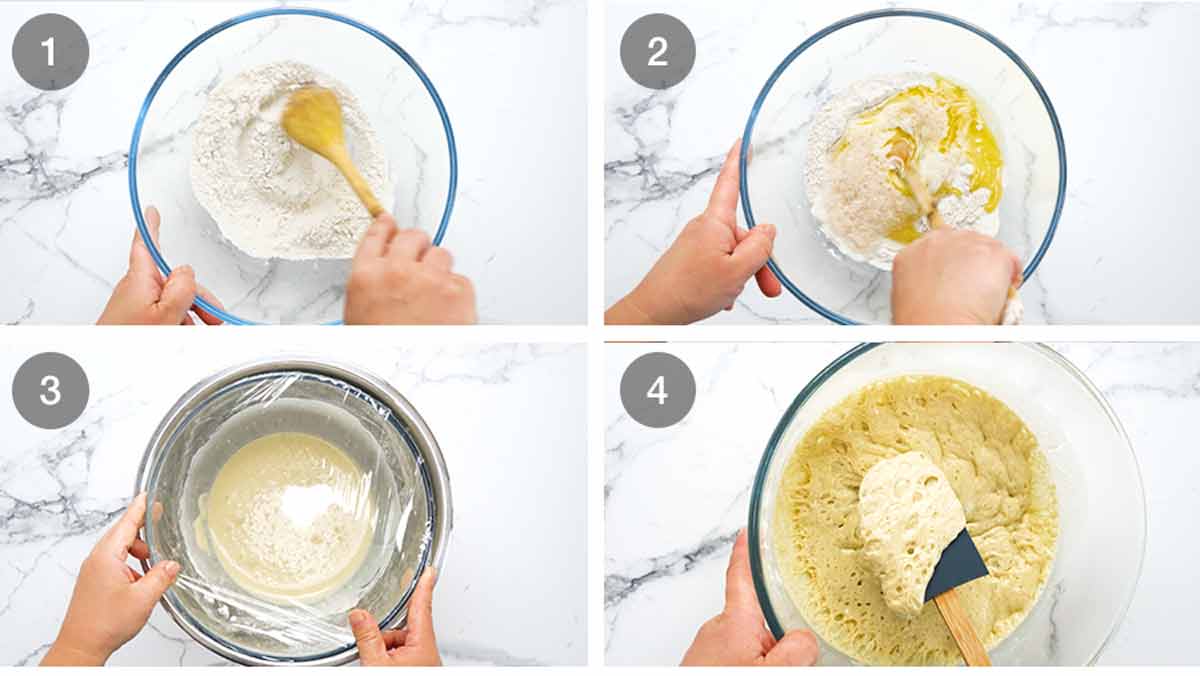
2. Make and proof blini batter
Once the yeast is activated, we can move on to make the blini batter. WINTER tip – If you’re in a cold environment, warm up the bowl before use by running it under hot water then wiping dry, or popping it in the microwave for a minute. This will help keep the mixture warm so the yeast becomes foamy. We’re only using a small amount of water here which will cool quickly if your kitchen is cold, and the yeast may not foam up. No foam appearing? Move it to a warmer place. Still not foaming? Sorry, but it sounds like your yeast is dead! Have another go, but if it still doesn’t become foamy, it’s time to replace your yeast!
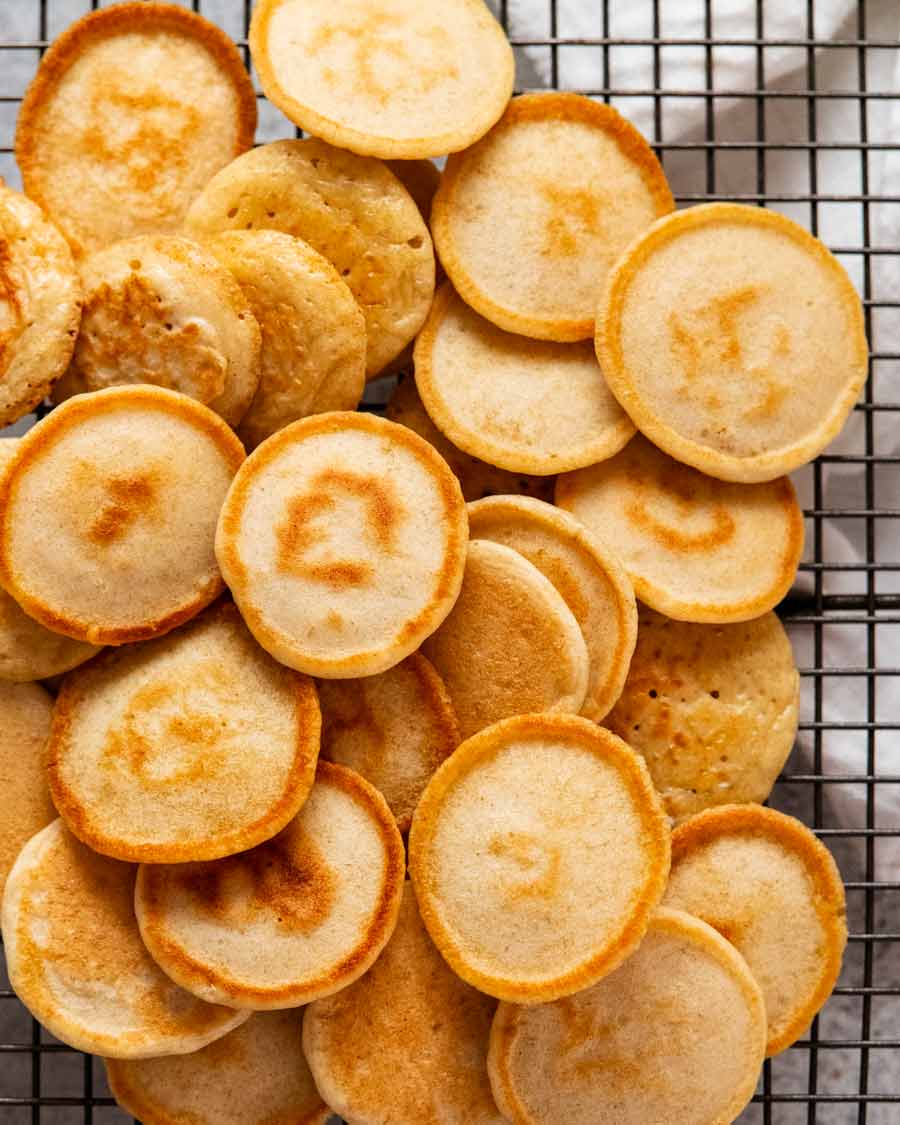
3. Cook blini
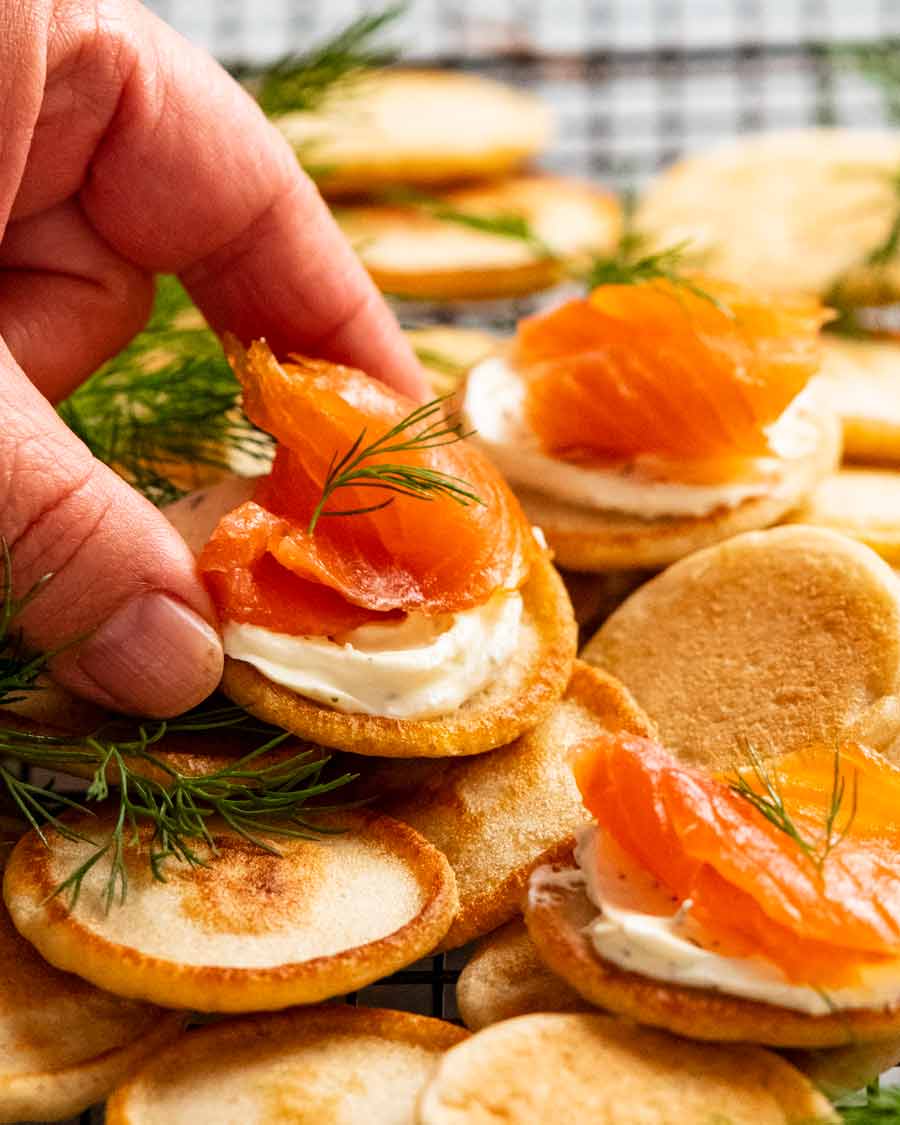
We’ve got 35 of these little pancakes to cook. But the good news is, they only take 1 1/2 minutes per batch! And yes, excessive use of the word “foamy” in today’s post has been noted! Let’s hope this is the end of it. 😂 Storing: Blinis are best made on the day of serving (make in morning then serving that evening is fine). We tried keeping them in the pantry, fridge and freezer overnight but they were all a little less fresh than ideal the next day. The alternative to a piping bag is to use a pouring jug. However, I find it easier to use a piping bag to make neat rounds. ⚠️ SAFETY WARNING: Do not spray a pan with oil while it is set on a turned on stove else you risk a fire blaster situation! REMOVE the pan away from the fire, spray, then safely return to the stove. Pipe 2.5 cm / 1″ rounds so they spread to 4cm / 1.7″. Cook the first side 45 seconds to 1 minute or until it has golden spots in the middle and has the signature gold Blini “ring” around it. Flip and cook the other side for 30 seconds. To get ahead, you can make the blini batter the day before then refrigerate overnight and cook the blini on the day-of which is pretty quick given they only take 90 seconds a batch! I’ve included directions for making the batter the day before in the recipe notes.
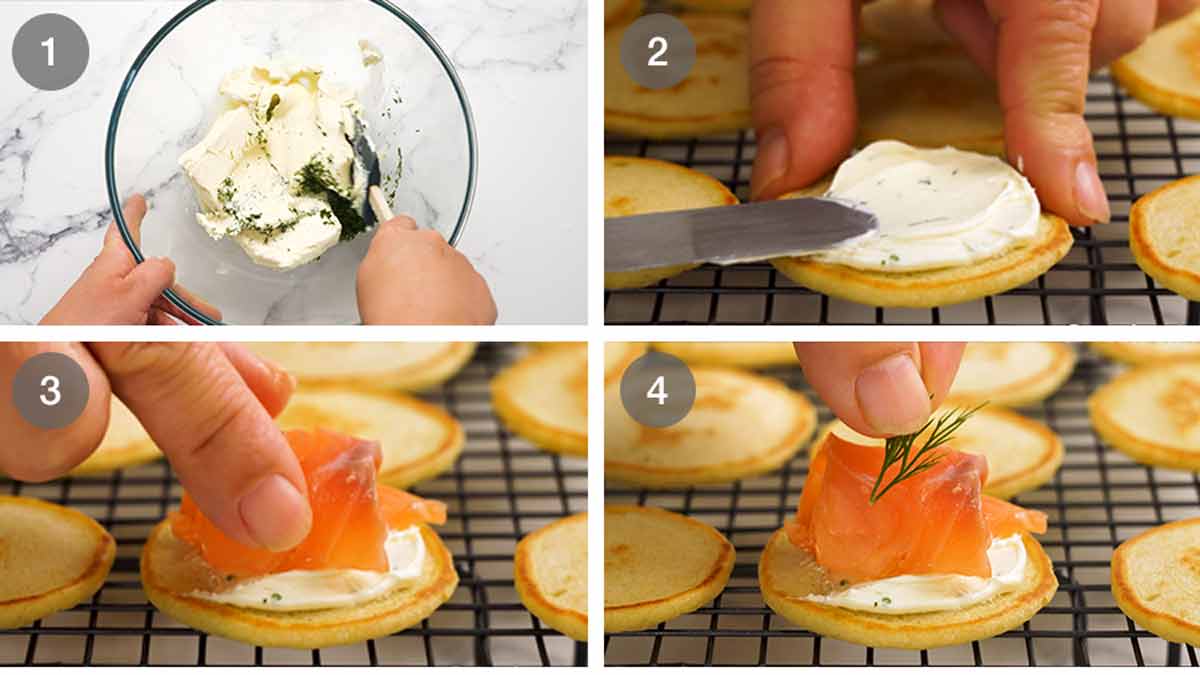
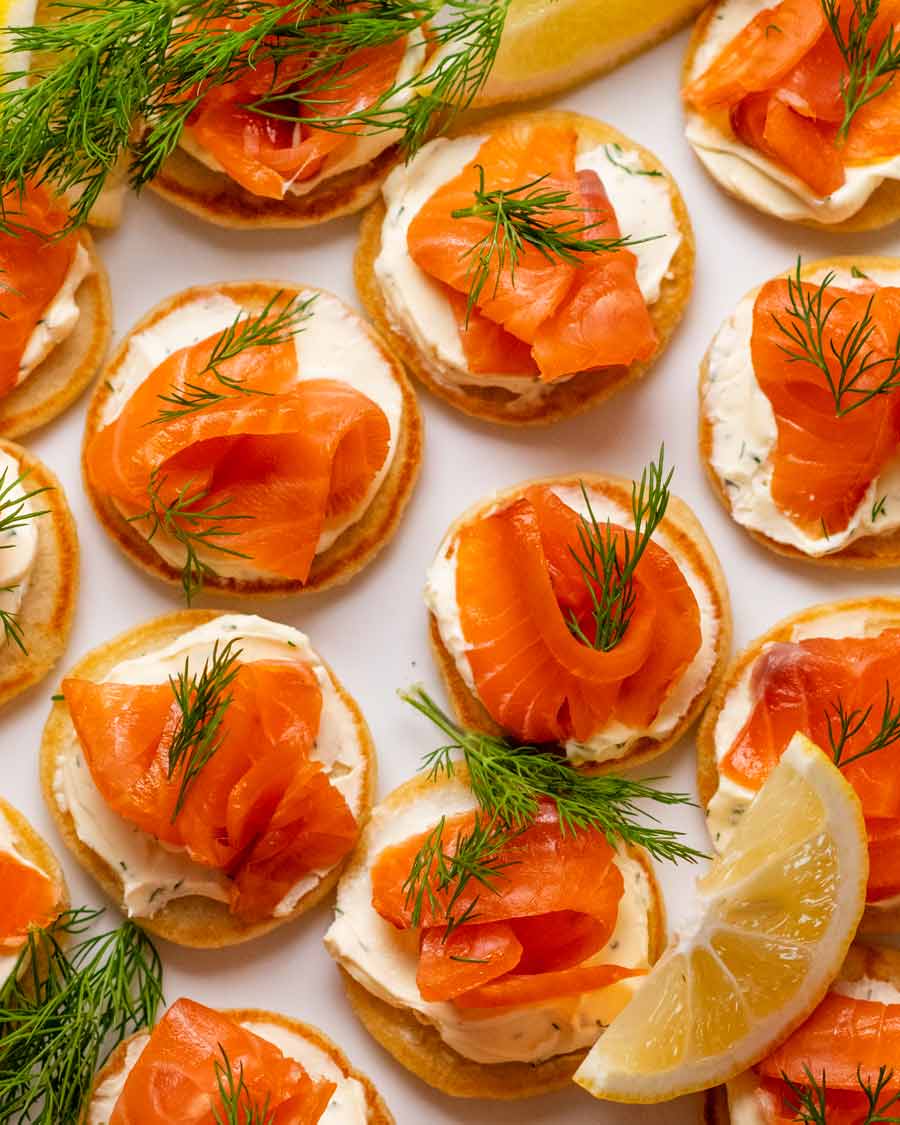
4. Assemble blini
We are so tantalisingly close to finishing these delicious little morsels! I know you’re impatient (oh wait, is that just me??!), but please ensure your blinis are fully cool before assembling. Otherwise the creamy dill spread will melt! Transfer your beautiful little blinis onto a platter, litter with some extra dill and lemon wedges for garnishes, pop open that bubbly and enjoy!
It is worrying how many of these I managed to inhale on one sitting when I filmed them. Oh, and also when I photographed them (yes, a different batch). Ummm, and yes, memories of all those test batches we did (instant yeast, active dry yeast, making the batter the day before, the blini-pikelet version, no buckwheat, no plain flour)….. Yes, I’ve certainly had more than my fair share of blini in the past few weeks. Face is, anything you can eat with one hand while clutching a wine glass with the other rates very highly in my world. That these are so elegant and make me feel a little classy is an added bonus. It’s not often I share a canapé like this. So let me have this one! 😂 – Nagi x
Watch how to make it
Life of Dozer
He only got this one cause I dropped it on the floor. No blini for Dozer! Too precious! 😂